JPG format manipulation guide
No.02
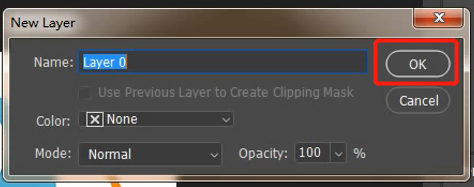
After file imported, convert the locked background layer to an editable normal layer
Right-click on the "Background" layer, select the "Background Layer" command from the menu bar,new cteat the "New Layer" dialog box, set the appropriate parameters in the dialog list (optional) and click the "OK" button to complete the operation.

Click to Image → Mode → Select RGB Color.

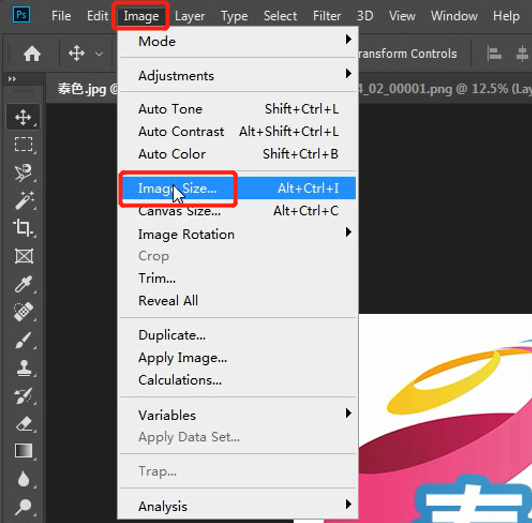
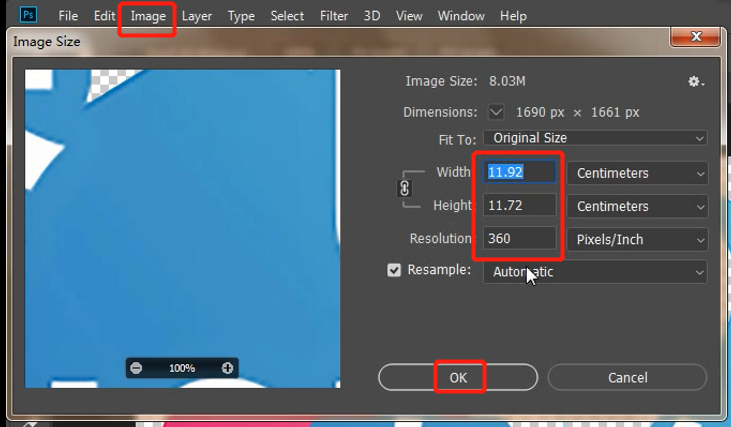
Adjust the size of the picture to the size required for actual printing, click Image → Image Size to bring up the dialog list, set the corresponding sizes in the dialog list and click OK.

Method 1: If the color contrast between the matting area and the background image is obvious, you can directly select [Magic Wand Tool], click the area you want to keep, then press Shift+Ctrl+i to reverse select the area, and press Delete to delete the background.

Method 2: If the outline of the area to be matted is clear, use the magnetic lasso tool in the toolbar for matting.

Method 3: Select the Pen Tool to draw a path for the area to be matted. After the path is closed, press the right mouse button to select the Create selection, and then press Shift+Ctrl+i to reverse select the area.Press Delete to delete the background. This method is recommended because it is the most accurate for matting.

After matting is complete ,press Ctrl+J to create a new layer and turn off the visibility of the original layer.

Click on the Layer Style to select the Stroke option, expand the pattern by more than 5 pixels, and enlarge the pattern to check the noise. If there is noise, Handle correct pattern stroke smooth and clean without parti-colour.


Only such PNG images can produce perfect label sticker, otherwise the stained areas will be automatically printed with a layer of white ink (as shown below), affecting the overall effect. So matting must be checked after completion.

Note: Remember to cancel the stroke command after checking
Important: It is especially important to check that the printed pattern should be covered with the screen to avoid printing size errors.
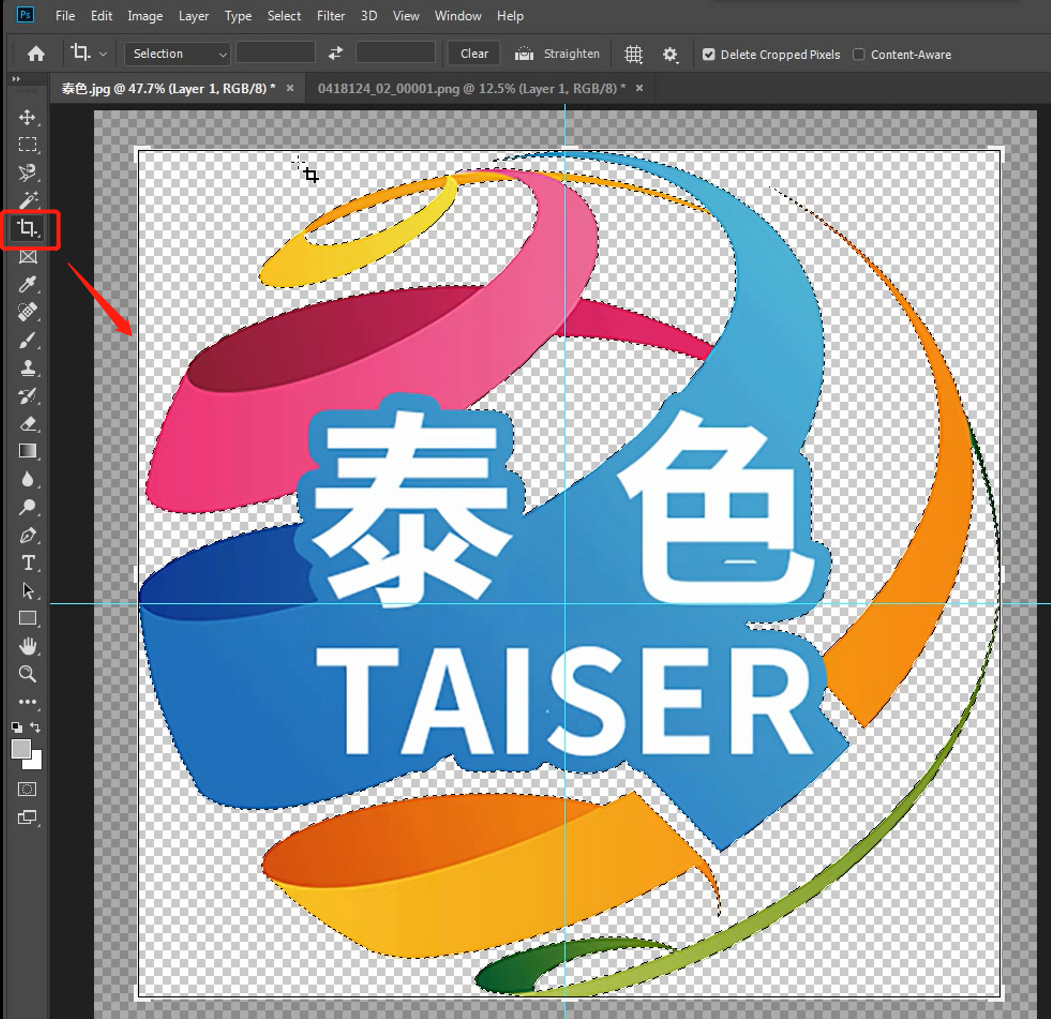
Use the cropping tool to operate. After the operation is complete, you need to set the actual print size of the image again.
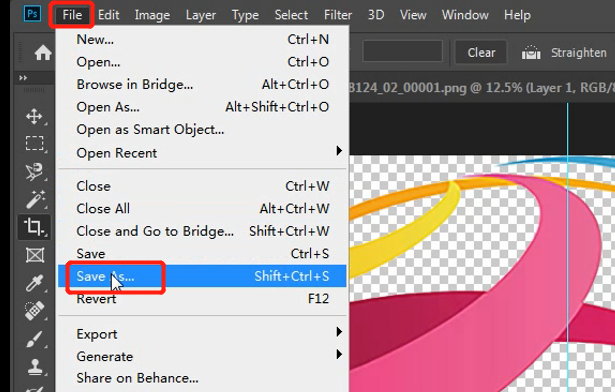
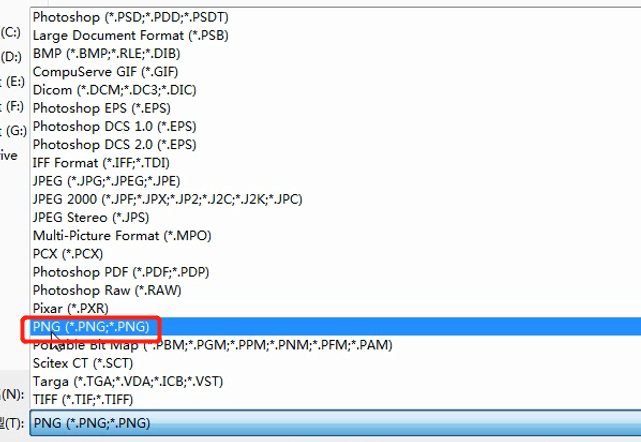
Finally, click on the file-Save as-select the PNG format to save.
No.03
Picture size ≤57cm; If the picture has no base map, the fine line or dot should be no less than 0.05cm
When edit pictures, select the pattern content as the channel, otherwise white ink will be added to the bottom of the print (as shown in the figure).
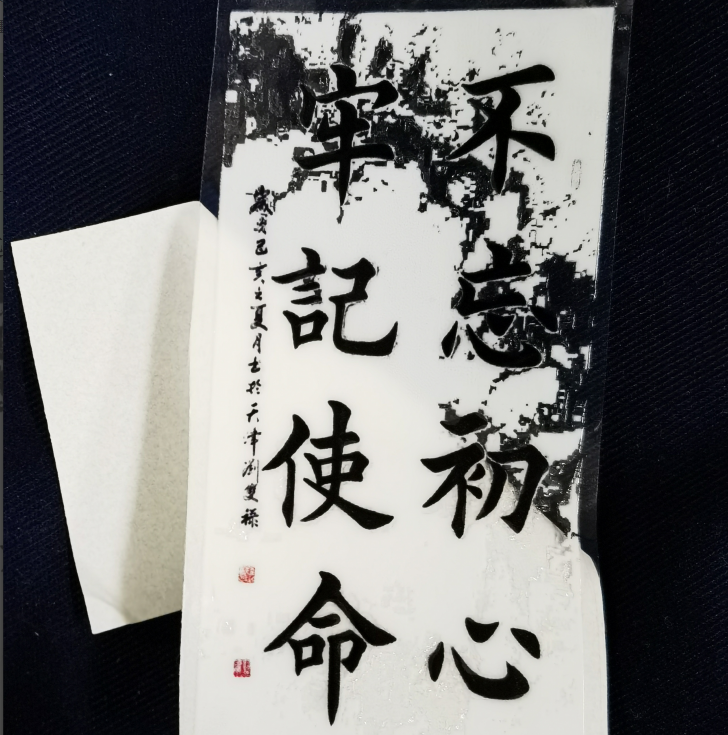
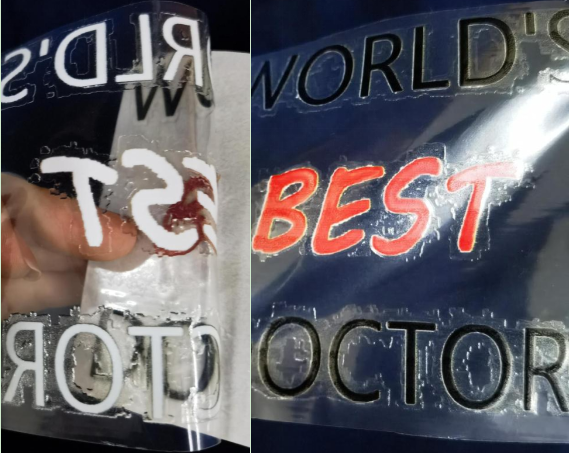
The image output size and pixel should conform to the printing standard, otherwise the printed pattern will be filled with irregular glue edges (as shown in the picture).
Add: No.6-2, Jinhua Zhong Road,Zhongshan
Tel: 86-760-88667090
Fax: 86-760-88667096
E-mail: betty@titanjet.com.cn
vivian@titanjet.com.cn
market2@titanjet.com.cn
market3@titanjet.com.cn